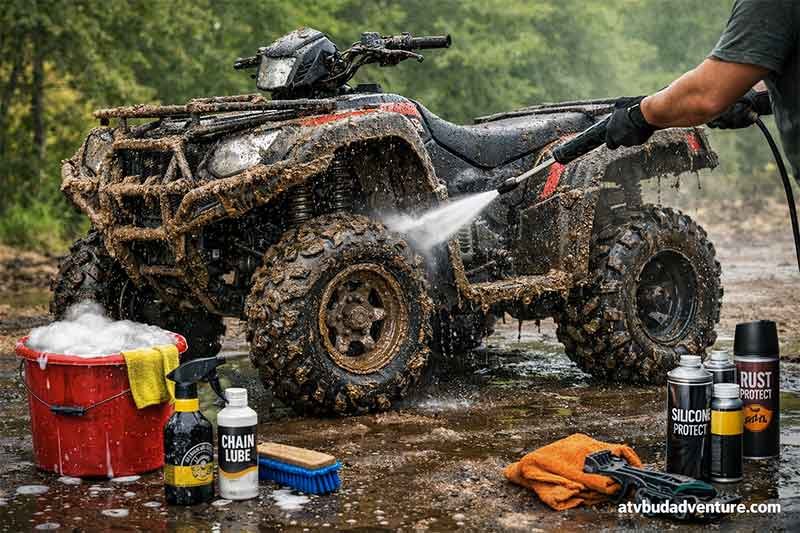
Mud riding is exciting. It’s messy, intense, and seriously fun. But once the adventure ends, knowing how to clean an ATV after mud riding becomes essential.
Mud is not harmless dirt. It holds moisture, traps debris, and slowly damages critical components. If you ignore it, rust builds up, bearings wear out, and radiators clog. Over time, this leads to expensive repairs.
This guide will show you exactly how to clean your ATV the right way. Simple steps. No confusion. Just real-world advice that protects your machine.
Why Cleaning Your ATV After Mud Riding Matters
Mud sticks everywhere. Around the chain. Inside the suspension. Behind the radiator.
When left unchecked, it restricts airflow and causes overheating. If your ATV has ever felt hotter than usual, clogged cooling fins could be the reason. Here’s a deeper explanation about ATV engine overheating causes and fixes.
Cleaning is not about looks. It’s preventive maintenance.
If you’re new to ATVs and want to understand how all parts work together, this guide on what an ATV is and how it works explains the basics clearly.
What You Need Before Cleaning an ATV After Mud Riding
Preparation makes the job faster and safer.
Here’s what you’ll need:
- Bucket with warm water
- Mild ATV or automotive soap
- Soft and medium brushes
- Microfiber towels
- Chain cleaner spray
- Chain lubricant
- Low-pressure hose or adjustable pressure washer
- Air compressor or leaf blower
Avoid strong detergents. They strip protective coatings and dry out plastic parts.
Also, never blast high-pressure water directly at seals or bearings. That mistake causes hidden damage. Many beginners unknowingly make this error. If you want to avoid other common issues, read about common ATV riding mistakes most beginners make.
Step-by-Step Guide: How to Clean an ATV After Mud Riding Properly
Step 1: Let the Engine Cool Down
Never wash a hot ATV.
Sudden cooling can crack engine parts. Wait at least 20 to 30 minutes after riding.
Step 2: Remove Thick Mud First
Before using water, break off heavy mud clumps.
Use a plastic scraper or gloved hands. Focus on skid plates, wheel wells, and under the fenders.
This reduces splashing and speeds up the process.
Step 3: Rinse With Low-Pressure Water
Use a garden hose if possible.
Start from the top and move downward. Let gravity help you.
Avoid spraying directly into:
- Air intake
- Electrical components
- Chain seals
- Wheel bearings
- Exhaust pipe
Keep your distance if using a pressure washer.
Step 4: Scrub Stubborn Dirt
Mix warm water with mild soap.
Use a soft brush for plastics and painted surfaces. Use a firmer brush for footrests, suspension arms, and tires.
Pay close attention to:
- Brake calipers
- Chain and sprockets
- Radiator fins
- Under-seat area
Mud hides in tight corners.
Step 5: Clean and Lubricate the Chain
Mud destroys chains quickly.
Spray chain cleaner evenly. Scrub gently. Rinse lightly.
Dry completely before applying fresh lubricant. Rotate the wheels to coat evenly.
This small step dramatically extends chain life.
Step 6: Dry the ATV Completely
Drying prevents rust.
Use microfiber towels first. Then blow out hidden water from bolts, joints, and crevices using compressed air.
Water left inside tight spaces causes corrosion within days.
Step 7: Inspect While You Clean
Cleaning time is inspection time.
Check for:
- Loose bolts
- Oil leaks
- Damaged brake lines
- Cracked plastics
- Worn tire tread
If you want a structured system, follow this beginner-friendly ATV maintenance checklist.
Regular inspection prevents bigger problems later.
How to Clean ATV Radiator After Mud Riding
Radiators often suffer the most.
Mud blocks airflow. That leads to overheating.
Spray gently from the back side of the radiator outward. This pushes debris out instead of deeper in.
Never bend the cooling fins. They are delicate.
If your ATV frequently runs hot after muddy trails, clogged fins are usually the cause.
Should You Use a Pressure Washer?
Yes, but carefully.
Keep the nozzle at a safe distance. Use a wide spray pattern.
Never spray directly at seals, bearings, or electrical wiring.
If you’re unsure, stick to a regular hose.
After-Wash Protection Tips
Cleaning is only half the job.
Apply silicone spray to plastic panels to restore shine and protect against UV damage.
Use anti-rust spray on exposed metal parts.
Re-lubricate moving components as needed.
Store your ATV in a dry, covered area. Avoid leaving it on damp soil.
If you ride in muddy jungle trails or rice fields, regular care is even more important. That’s why professional tours like the Ubud ATV Jungle and Rice Field Tour always maintain their units thoroughly after every ride.
How Often Should You Clean Your ATV?
After every muddy ride.
Even if it looks “not too dirty.” Hidden mud still causes damage.
Frequent mud exposure demands consistent cleaning. It keeps your ATV running smoothly and safely.
Maintenance may also vary depending on your ATV type. Electric models require different care compared to gas-powered ones. Learn more about the differences in this guide on electric ATV vs gas ATV.
Quick FAQ About Cleaning an ATV After Mud Riding
Can I wash my ATV right away?
Wait until the engine cools down completely.
Is dish soap safe?
No. It removes protective layers and dries plastic parts.
How do I prevent rust after washing?
Dry thoroughly. Lubricate chains and metal parts. Store in a dry space.
What happens if I skip cleaning?
Mud traps moisture, damages bearings, blocks radiators, and increases the risk of overheating and brake failure.
Ride Hard. Clean Smart.
Mud riding is part of the thrill. Cleaning is part of being a responsible ATV owner.
Knowing how to clean an ATV after mud riding protects your investment. It improves performance, extends lifespan, and reduces repair costs.
If you want to enjoy muddy trails in Bali without worrying about maintenance, visit ATV Ubud Adventure. We offer exciting ATV tours through jungle tracks, rivers, caves, and rice fields in Ubud.
Book your adventure today at ATV Ubud Adventure. Call, SMS, or WhatsApp +6287877066948 or simply click the chat button on our website.